HOW TO Make a PUNCHING BAG with TIRES
A low-cost punching / boxing bag with high performances
Unlike many other training tools, a hand-made punching bag with tires offers performance equal (if not superior) to many of its professional counterparts:
- It is low cost (almost free)
- It lasts a long time (read also How to protect a punching bag)
- It can be changed / adjusted effortlessly
- It can be placed outdoors
- It has the right consistency and weight
- …
Note – This article has been asked by one of our Core Course practitioners on Patreon (see how to attend our home study classes here Learn Kung Fu online: a beginner-to-expert course).
How to build our punching bag
What we need
These are the materials that we need:
- 3-6 tires – Depending on our needs, we can choose any size / number of car tires (the only rule is that they should be equal and in good condition)
- 3 chains of the same size – The length of each chain should be equal to the diameter of the tires (but this depends also on the height and position where we will hang the bag)
- 15-30 fully threaded bolts – With a rather large diameter (10-12 mm) and 5-10 cm of length (depending on the nuts and the tire)
- 15-30 nuts – To block the bolts
- 30-60 washers – For good work, there should be 2 for each bolt
- 3-4 carabiners – With safety or threaded closure (let’s choose them in relation to the total weight of our tires)
- 3-4 ring shape lifting eye nuts – To connect the chains to the bolts
- 1 rotating bracket support – The heavy bag must have the possibility to rotate (this way the chains are less stressed)
- Eventual hanging materials – Ropes, chains, hooks, dowels (etc.) depending on how we want to hang our bag
Let’s opt for stainless steel materials.
A note by Master Kongling – The number of bolts depends on the durability we want for our bag: more bolts and more washers means less stress on the tires (that we will hit with all the possible power of our legs and arms).
These are the working tools that we need:
- A tape measure – To check and choose the right sizes and distances
- A drill – For a fast / temporary installation we could use even a knife, an awl or sharp scissors but the irregular gash will quickly wear down the tire
- A drill bit – It must be slightly bigger than the diameter of the bolts
- A wrench – Of the right measure, to tighten the bolts
- Lubricant – For the rotating bracket support
All the building steps
Note – Let’s read the entire tutorial before beginning to work.
The preliminary steps:
- First of all, let’s choose the installation position where we will place our punching bag (a beam, a tree, a hook with dowels, etc.)
- Let’s avoid unstable / weak supports (the stress that they will have to face is big and each tire could weigh 6-15 Kg)
- Let’s avoid too small places, a punching bag needs (at least) a free circular space around it whose radius is greater than its total height (chains included)
- Let’s choose the type of bag (height, diameter, shape, etc.) we want / can build in relation to our needs and space
- Let’s measure the space at our disposal and in relation to it (broadly), let’s choose the chains, the tires’ thickness, etc.
- Let’s not forget that the chains must not be long enough to intertwine or too short (their ideal inclination is around 45°)
How to assemble the punching bag: a few easy steps
Important – If we are minors and / or impractical of DIY, let’s ask for the help of an expert adult (handling these tools is dangerous).
The holes in the tires:
- Let’s use the drill to create 3 holes in the first tire (6 if we want a stronger structure)
- The holes must be opened in the top part
- The holes must describe an equilateral polygon
- The holes must not be too near the border
- Done the holes on the first tire, let’s place small squares of adhesive tape from the smooth side over each hole
- Let’s position the next tire exactly above the first one (this way the tape will pass precisely where we will have to drill)
- Let’s repeat symmetrical holes at the same distances on all the other tires
- In any case, the upper tire must have in its top part only 3 holes
The bolts:
- Let’s stack 2 tires one on top of the other (making the holes coincide)
- Let’s insert the bolts with the head facing downward and with a wrench as a separation
- Let’s screw (on the other side of the hole), the relative nut, also accompanied by a washer
- Let’s tighten the nuts firmly but without exaggerating
- Let’s repeat the operation for all the tires, except for the top one
- On the top one, we have to mount 2 nuts per bolt, the first to fix to the tire and the second as a reference for the ring nuts
- Let’s screw the ring nuts leaving the space to let the chain pass
The carabiners:
- Let’s fix 2 carabiners for each chain (one for each extremity)
- Let’s fix 1 carabiner for each chain to the ring nuts
- Let’s fix the remaining extremities to the rotating bracket support
- Let’s use the lubricant on the rotating bracket support
- Let’s hang our tires heavy bag
Variations
Let’s see a few ideas:
- If we don’t have conditioned hands, we could cover the structure with a smooth plastic or with a synthetic leather cover (this way we will avoid getting dirty or abrading our hands)
- It is rare but if the bag seems too light, we can fix sealed sandbags inside the wheels
- …
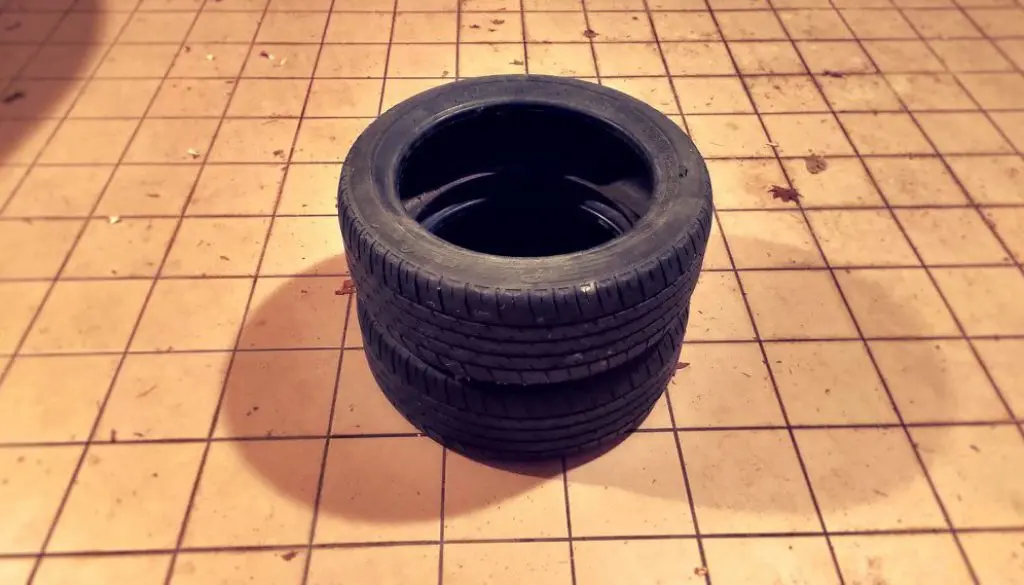
Preview
Here we can see a practical example directly from one of our students (F.S.):


Final notes
A few conclusive thoughts:
- In our school, the punching bag is an important practice that stays between the Poles training (read Basic tools: the pole) and the Hanging Speedball training (read Basic tools: the Hanging Speedball);
- It is important to stress that our practitioners start to use this tool (intensively) only after the awakening phase of our martial development (read )
- In our method, the punching bag is a too static tool and for a beginner is totally wrong (it is made to build power and stamina)
- Let’s never hit the bag with our hands not aligned with our forearms or with a weak wrist (beginners are strongly advised to wear gloves and / or bands)
- …
In-depth video courses
- DIY training tools for martial arts – How to build all the necessary training tools for our Kung Fu
- Basic 6 Dragons Kung Fu Exercises – The core practices of our Kung Fu (how to set up them, the execution and all the details)
- Advanced speed and reflexes training – A pro-level course about speed development and improvement
In-depth articles
- A Wing Chun wooden dummy like in PVC – A beginner / test version of Wing Chun’s Muk Yan Jong
- The 6DKF’s PVC wooden dummy – The low-cost “reactive” dummy of 6 Dragons Kung Fu
Questions
Reply in the comments and share your experience:
- How many tires will you use?
Author: Master Kongling
Founder of 6 Dragons Kung Fu.How to master 6 Dragons Kung Fu?
Are you searching for:
- Daily training exercises?
- Synthetic theory and concepts?
- A step by step path from white to black belt?
- A path (clear, consequential and gradual) designed to build real martial skills?
- A direct contact with Master Kongling?
Go to our Patreon page and choose a training plan: starting from the Practitioner level, you will gain access to all this and much more.
Inside each Premium Lesson, you will receive the same teaching (practices, tips, concepts, small secrets and corrections) reserved to the live students of Master Kongling.
Important - Once a certain number of registrations are reached, no other participants can be accepted. For more information write to: [email protected].


